Documentation
Omnia Web API Integration
This is the API integration document for the Arteco Video Analytics system.
REST API list can be found here: API REST List
If you have any questions that are beyond the scope of this help document, please feel free contact us via Email.
Server Login
Arteco Omnia REST APIs support token-based authentication via the Authtoken request header. The POST Login API is used to retrieve the authentication token. After the authentication token is obtained, it must be inserted into the Authtoken header for all requests.
This demo shows how to obtain the access_token of a server. Note, in this example, the authentication has been disabled on the server.
 function sendData() {

              const artecoServerIP = document.getElementById("artecoServerIP").value;
              const username = document.getElementById("username").value;
              const password = document.getElementById("password").value;
              const url = artecoServerIP + "/api/v2/login";

              const XHR = new XMLHttpRequest();

              // Define what happens on successful data submission
              XHR.addEventListener("load", (event) => {
                //);
                const response = JSON.parse(event.target.responseText);
                alert(response.root.access_token);
              });

              // Define what happens in case of error
              XHR.addEventListener("error", (event) => {
                alert('Oops! Something went wrong.');
              });

              // Set up our request
              XHR.open("POST", url);

              //Send the proper header information along with the request
              XHR.setRequestHeader("Content-Type", "application/json");

              const data = {
                "username": username,
                "password": password
              }
              // The data sent is what the user provided in the form
              XHR.send(JSON.stringify(data));
            }
Try it yourself
Send live event
Arteco Omnia REST APIs can send live events to a channel ID. The POST Login API is used to provide all the information to the server in order to create a new event. This API must be sent as a "Content-type:application/json".
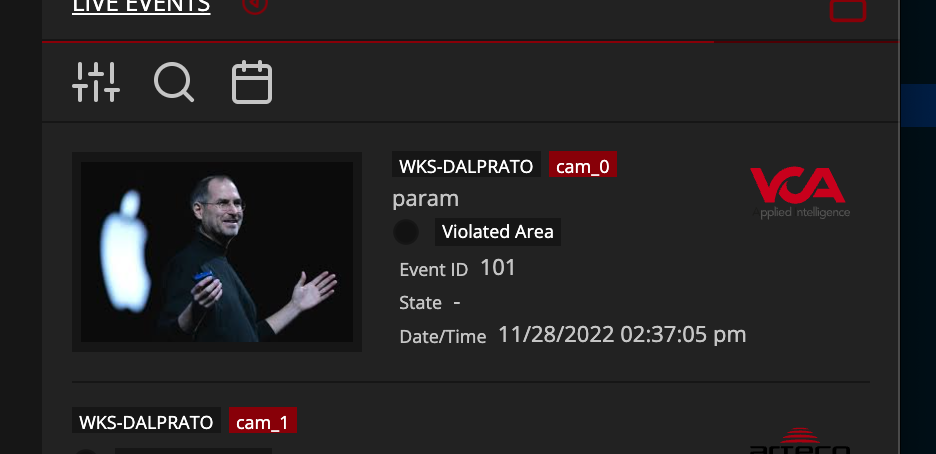
Picture of a live event:

Example code in order to send event to Arteco Server: Note, in this example authentication has been disabled on the server
              function sendData() {

              const artecoServerIP = document.getElementById("server_live_event_artecoServerIP").value;
              const artecoServerParam = document.getElementById("server_live_event_artecoServerParam").value;
              const url = artecoServerIP + "/api/v2/event";
              const XHR = new XMLHttpRequest();

              // Define what happens on successful data submission
              XHR.addEventListener("load", (event) => {
              alert(event.target.responseText);
              });

              // Define what happens in case of error
              XHR.addEventListener("error", (event) => {
              alert('Oops! Something went wrong.');
              });

              // Set up our request
              XHR.open("POST", url);

              //Send the proper header information along with the request
              XHR.setRequestHeader("Content-Type", "application/json");

              // The data sent is what the user provided in the form
              XHR.send(artecoServerParam);
              }
Json example of the code needed in order to send a live event to Arteco
{"lane": "manageEvent", "data": { "ctx": "liveEvent", "chId": 0, "param": "param", "brand":"VCA", "integrationType":"integrationType", "data":"data", "image": "base64image","cat": 200 }}
Try it yourself
Support
If this documentation doesn't answer your questions, please contact us via Support email
We are located in the GMT +1:00 time zone and we answer all questions within 12-24 hours in weekdays. In some rare cases the waiting time can last upto 48 hours (except for the holiday seasons which might take longer).